Sunday, September 28, 2014

1912 Suit In Progress

First try and plaid doesn't match at all on the front side and front.
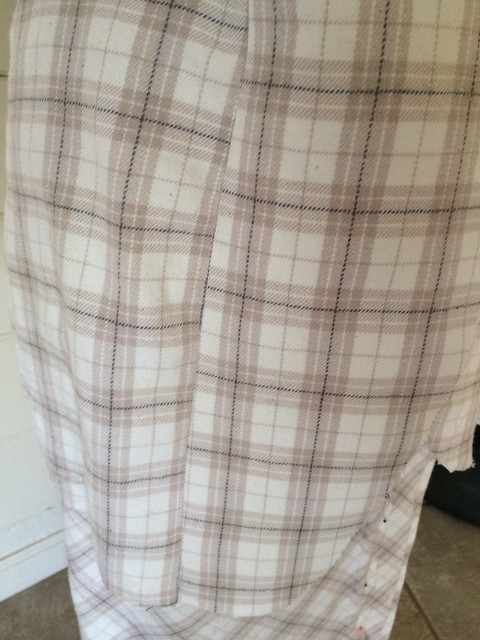
Front and Front Side don't match up
Decided I used the lining fronts and unstitched and used the other pieces which matched better, but not perfect.
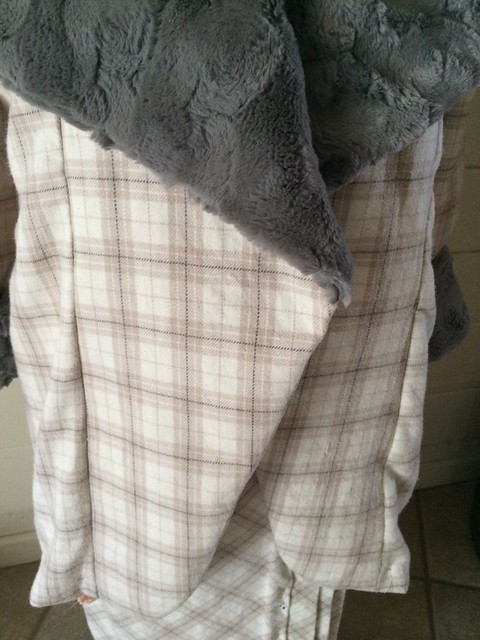
Front seams still don't match up
What I totally messed up was that the side front piece was supposed to be 7/8" longer than the front piece. I eased the front side piece in instead of leaving it longer. So, one of those pieces might have matched better if I had sewn them together correctly. I didn't feel like ripping it out and sewing it a third time so I just shortened that front piece by about 7/8". I kind of regretted it later and wished I had resewn it. To fix now, I would have to cut out 4 more pieces and interfacings and unstitch/restitch.

The "Bib" with extra lace and ribbon around the collar. Still needs hooks and eyes in the back. Kind of like a dickie or chemisette. Only bound by the collar hook and eyes.
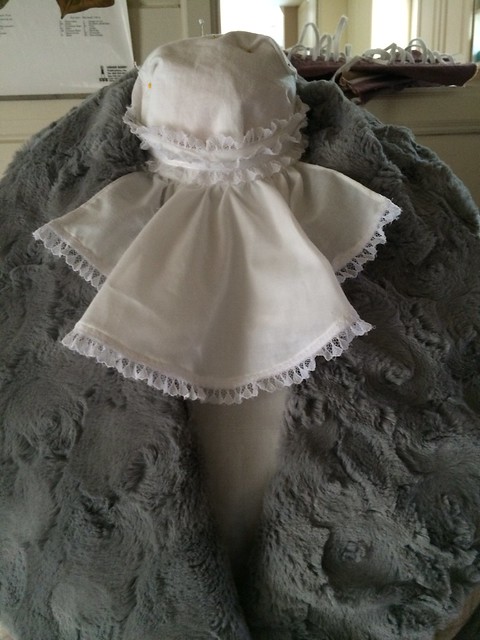
"Bib"

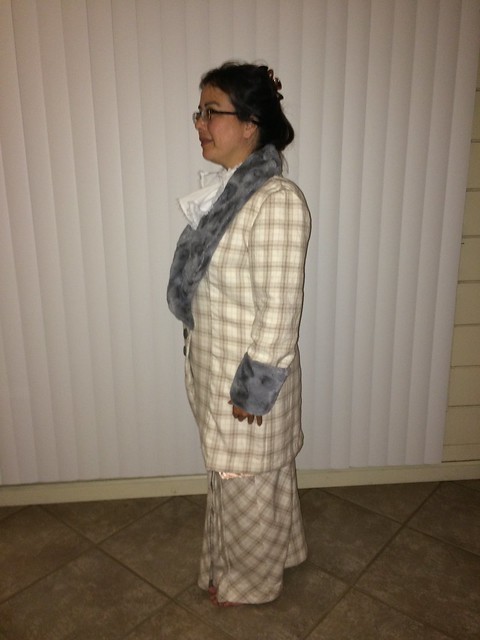
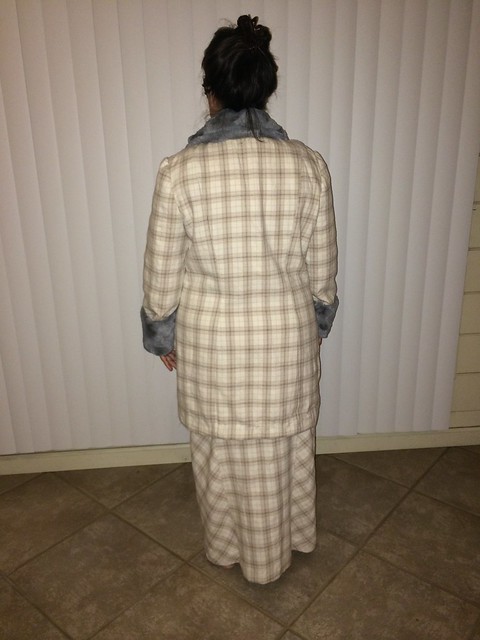
Still haven't finished the hem and buttonholes on the jacket. First thoughts are that this would look better on a taller, more slender person. Even though, I hemmed the skirt 1/2" higher in front, it still ended up longer in front. Pleats allow for walking. The top of the jacket is too big on me. The hips fit fine. Because the jacket is worn more like a dress, seems like the top should be closer fitting. That might mean taking in some of the sides and move the armholes up. That might mean taking in some of the sides and move the armholes up. And maybe the jacket should be an inch shorter. Hmmm... that sounds like a lot of work.
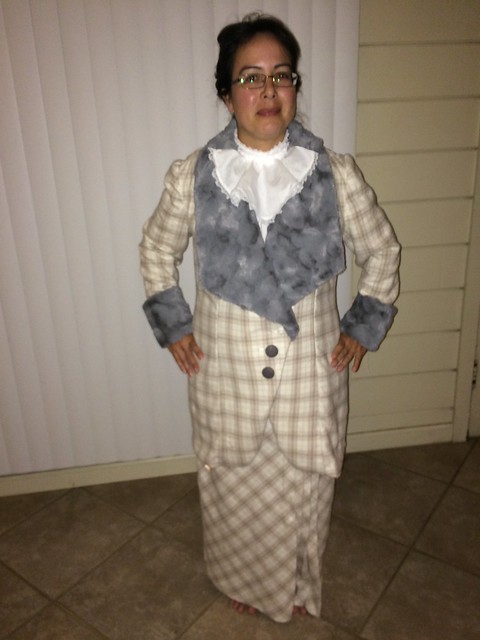
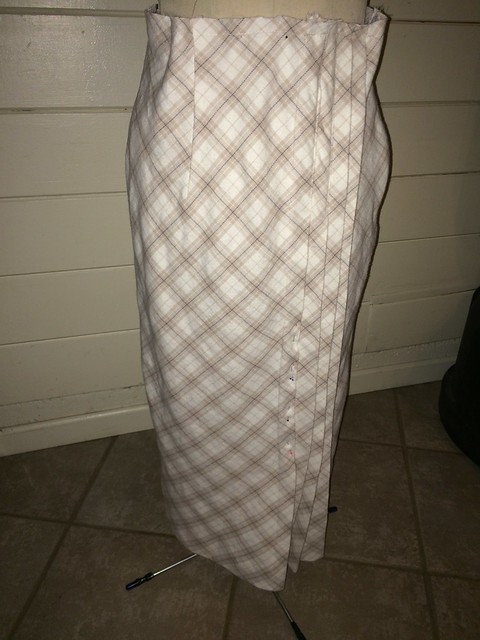
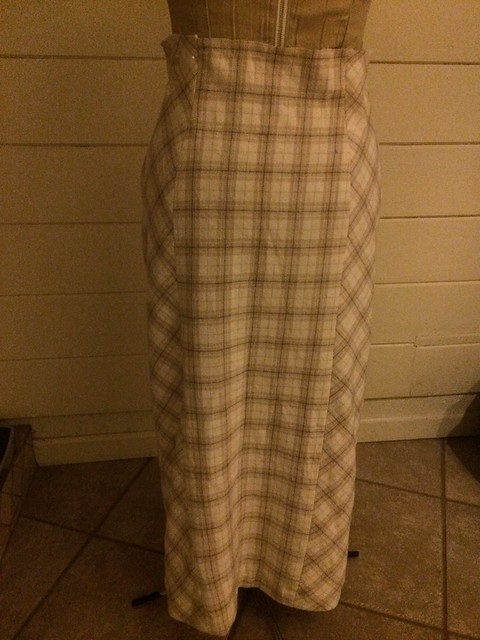
In progress front view In progress side view In progress back view

Thursday, September 25, 2014

1912 Daywear - Suit Dress

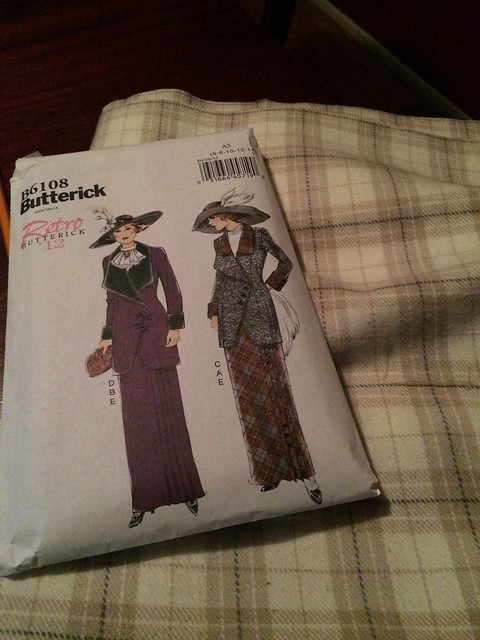
While the electricity was out this morning, instead of sewing a UFO, I started cutting out Butterick B6108 Retro 1912 suit out of cotton flannel.
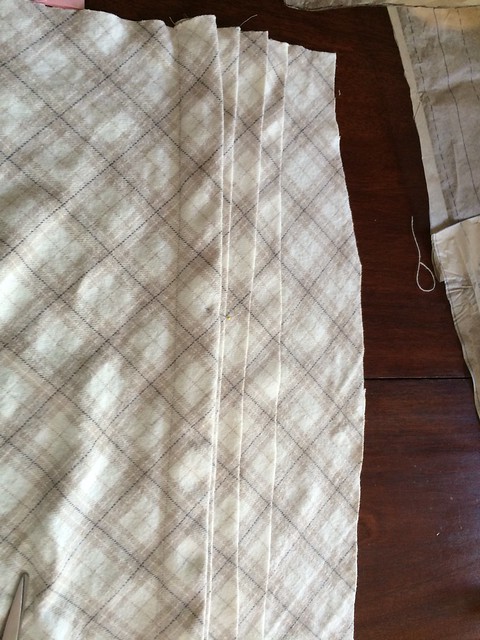
Reproduction 1912 Suit In the afternoon, I started sewing the front pleats even though I had the beginning of a smashing headache. Bad idea. Headache + pleats on the bias = Fail
Headache + sewing = fail
Later in the evening, I tore out the pleats and tried, again. Still doesn't look quite right and I don't see how 7/8" buttons would fit on these pleats. The front and side panels are cut on the bias which creates some ease in tight/slim skirt. Trying to sew even pleats with fabric that stretches doesn't work so well. This pattern might be better with a tighter weave than cotton flannel. The jacket will cover the closure. I put in an invisible zipper instead of a regular zip. I still need to add the waistband and tack down some of the pleats. Three of the pleats are only partially sewn so that the bottom hem has some kick.
Front
Skirt started Back
Skirt started

Tuesday, September 02, 2014

Website Updating

My website, Darling and Dash, has not been updated in several years. When it was started, internet speeds and bandwidth were low so photos were reduced to small thumbnails. Much has changed and many more costumes were made. I started uploading photos of unrepresented costumes. Maybe there will be detail pages to go with each costume later.

Sunday, May 20, 2012

Ladies Dress #4016

Next Vintage Pattern Lending Library 1912 Project is the Ladies Dress #4016 that came without instructions. It reminds me of the modern magic dresses that are popular right now with a slimmer inside portion and darker outsides although without the hourglass form. It mimics the layered dresses of the time period, but is not truly layered.

Printed it out and taped it together.  I'm enlarging the seam allowance to 5/8" since that is the standard on my machine and will give more fray and fudge factor. Says it is for a 34" bust.

other flat measurements
natural waist 26.25"
hips (9" below waist) 37.25"
Figuring in ease this is more like
bust 34"
waist 24-25"
hips 34-35"

So, I will need to enlarge the pattern by 2"bust to 6"hips and am thinking of splitting down the middle of the skirt front and back. The bodice piece is an odd shape so may need some figuring in to add a couple inches. If neckline is altered then the collar will need to be enlarged.

There is no pattern pieces for the bottom border. Looks like it may be made by just adding enough to the bottom to get to the ankle/hem.  Also no pattern pieces for belt, bow or welt trim.

Stitch or Add Gusset The bodice piece has a line for a slash. The sleeve and side seam lines do not look like the seam is supposed to go up and around the slash. It looks like a place for a diamond underarm gusset except that then the trim band doesn't match up and there was no gusset on the pattern. It is difficult to make an underarm measurement with this pattern since it does not have shoulder seams to see if the armhole area will need to be enlarged.

Closures looks like they go up one side of the front.

Saturday, February 25, 2012

Pleats on first mock

Pleats on the first mock under the gray lace. Can't really see them, but they make a different in the fullness. Also added snap tape to the back opening. Not sure that will make it easier to put on by ones' self, but will be much easier to get out of.
Pleating added under lace

Thursday, February 23, 2012

Perfect Pleater Pleats

Using the Perfect Pleater to make pleats for the Princess Slip. White Symphony broadcloth has polyester in it so using the Raja cloth and hoping to set the pleats. Depth doesn't look right so will have to try something else after the mock.
Perfect Pleater Pleats

Saturday, February 11, 2012

Mockup

Used cotton muslin to make up the mockup.  The top is a little too busty and I had trouble where the shoulder straps met the top of the front and back.  Not sure whether the slip is supposed to be loose and the waist and hips need widening or  if the bust should be taken in.

Laying and cutting the pattern
Laying Pattern
Cutting Pattern

Odd corner not matching up

Pinned together
Pin it all

Sewing 3/8" seams
Stitch 3/8"

The funky corner
The funky corner

The mockup
Ladies Princess Slip Mockup Front
Ladies Princess Slip Mockup Left


Ladies Princess Slip Mockup Back
Ladies Princess Slip Mockup Right

Bunchy too much fabric up top
Detail too much in bust
Corners not matching


Detail of corner not matching

Because muslins seem wasteful, I went ahead and cut in the top front and inner straps, did narrow hems, and added lace so it could be used with a blue Titanic dress.  Both the slip and the dress still need closures and the dress will have a belt.

Top still funky
Still bunchy up top

Adding lace
Adding lace, back still needs closures

Lace slip under blue dress